Home Page
Contact Info
Order Form
Price List
Handle Info
Shipping Information
Current Items in Stock
Photo Album #1 - 2013-2014
Photo Album #2 - 2014
Custom Made Wood
Presentation Boxes

Western Kitchen Knives
4" - 6" kitchen knives
7"- 12" knives
Paring knives
Boning Knives
Carving Knife and Forks
Fillet Knives
Steak Knives
La Mezzaluna
Asian Kitchen Knives
Kiritsuke & Sujihiki
Hankotsu
Santoku
Thai Cleaver &
Yasai Bocho
Korean Style
Other Stuff
Wildfire's Reviews #1
Wildfire's Reviews - #2
My Auto Bio
FAQ's
Guarantee
Re-do Older Knives
Custom Set 1
Custom Set 2
Care Instructions
Wildfire in the Media
N.Y. Times article
N.Y. Times Video
L.A. Times
Guardian U.K.
Wildfire in a book
Wildfire & Gant Rugger
More Gant and Wildfire
Wildfire In Austin
Just for Fun

|
Care Instructions for the care of kitchen knives
Care of the surface, handle and edge of carbon steel kitchen knife

**JUST IN - Product shown below is called a sanding block. They come in all the grits. I have an 80 grit block in my kitchen (fairly coarse) that I've had for years, which was a freebie thrown in the box with a sanding belt order. I use this block all the time for cleaning out a cast iron pan, clean off a BBQ grill, or any heavy scouring. I suggest getting one that is around 140-180 grit for the handle and blade portion of a carbon steel knife & clean a cast iron pan or grill. It will remove built up stuff on the handle so you can re-oil it, and clean off surface of a blade. It can remove a bent point as easy as kiss my hand, AND you can even sharpen with it. Can be found in any hardware store, cheap.
How to care for your blade & handle
There is no such thing as a hard impenetrable (by water, oils, surfactants, etc.) finish that does not have some toxic repercussions in the home or the environment. If you want an environmentally clean handle on your fine kitchen tool, it has to have some form of upkeep. Since I and my family consciously try to avoid household chemicals in all forms, then the trick for me was to find a clean finish that needs to be periodically renewed and to keep it easy and simple, which is what this page is all about. You will find that your knife will not only be an easy tool to sharpen/hone but also easy to re-finish.
The Blade Surface
As far as the blade portion of the knife is concerned, I rinse and wipe it off with a clean dry cotton kitchen towel after I use it. That is all I do, and the blade stays silvery. If you washed your car, you would need to wipe off the windows to prevent spotting. It is sort of the same thing here. It is also a good habit to prevent cross contamination. If I stopped this, the patina would build up, which is perfectly fine also.
Usually if I am cooking, I will wipe off pretty consistently throughout the process and do a double wipe when finished. I generally hang a towel over my shoulder when working, but many pull one through a belt or apron string, ala Chef Pepin.
I use water (hot/cold) and the green side of a scrubbie sponge (salt, no soap), to clean off the surface, if I cut something that sticks to the surface like cheese, or if I cut raw meat. Then I wipe dry. Soap works great also, and is a definite option if you prefer. I simply prefer kosher salt.
You can also use other ways of cleaning the knife surface, such as Bon Ami (see F.A.Q. page for my video), 320 sand paper, medium grit sanding pads, etc. The idea is to abrade away spots/rust, which is so easy to do. Be careful of the edge, rinse when done and as always, dry off surface.
How I finish all handles
Good video on how to make and use your own oil/wax finish to use on the wood section-HERE
→Here is a video on a few pre-made finishes.
During the machine sanding process, between 36 and 120 grit, I dip the wood handle in water and allow it to dry. This will raise the grain, which is then sanded down. I go up to 400 grit, which removes all visible scratches.
Once I finish with the machine sanding phase, all my handles are then hand sanded to 600 grit, then given a coat of grain filling Bulls Eye Shellac, to fill in the wood grain. Shellac is suspended in alcohol and as clean as a finish can get. The shellac penetrates the wood and fills in the grain, which is all I want.
Once Shellac is dry, I steel wool the shellac off using 00, 000 and 0000 grade steel wool, and then apply my oil/wax mixture and allow to sit for 2 hours while the wood absorbs any oils, leaving the wax on the surface.
Then I hand buff the wax out .
The blade is inscribed with my logo, and finally all oils are cleaned from the blade surface using 91% alcohol.
If wood on the handle looks dry or feels rough, simply allow it to dry (ideally for 1/2 to 1 day), and use sandpaper to sand down the raised grain on the wood.
To do this, first wrap something around the edge. Masking tape is ideal but a towel works great. This will help prevent getting cut. It is not necessary, but I have to mention it.
Then get sandpaper in sheet or block form at a hardware store. Rub handle wood using first 220-240 grit and then 320 grit. If you need to, you can start with 120 grit. Rub back and forth the long way, until old kek build up is gone.
This takes two minutes. What works best is to use a hard or soft block that you wrap the paper around or try a coarse/fine sanding block.
Then wipe on any convenient oil or wax/oil and allow at least 30 minutes for the wood to soak it up.
Then re-coat and keep this up for around 3-4 coats. You can use any oil pressed from a nut or even seed oil. When the wood does not soak up oil any more, your done. You can then, apply a paste wax to the surface. Just make sure to review the products ingredients.
I finish my knife handles with an all in one, oil/wax finish as the last step, and then hand buff. I make my own, but Howard's makes a product called 'Feed-n-Wax' that is excellent for kitchen knife handles and all wood furniture and I recommend it.
Wood is like any natural material, a little bit of upkeep always goes a long way. Now wipe off and start motor.
Cast Iron Cookware
No matter what condition a cast iron pot/pan is in, it can be brought back to new-ish condition. Simply start with a coarse sand paper like 120 and start sanding. If 120 does not work, try 50 grit and then 120.
The old built up surface kek will then be removed with enough elbow grease. Then rinse with soap and hot water. Place on stove
top after wiping dry and fill the bottom of pot/pan with kitchen oil (no mineral oil) and bake at 200 degrees F for about an hour. The pan will be HOT so watch out when removing! Wipe clean after temperature of the pan is warmish using paper towel and tongs.
Once it is cool, dredge bottom with salt, and wipe clean. Thereafter, I clean my pan with salt and a paper towel or sponge green side, if there is cooked on kek (eggs) .

Above : Said scrubbie sponge w/ green scouring pad on one side. Scotch-brite is twice as durable as all other brands and I highly recommend it. Hardware store bought sanding pads (medium or 120 grit) really work well also, and last a long time. If you went this route, do not use the pads for anything else but your in house projects.
Re-Edging
 
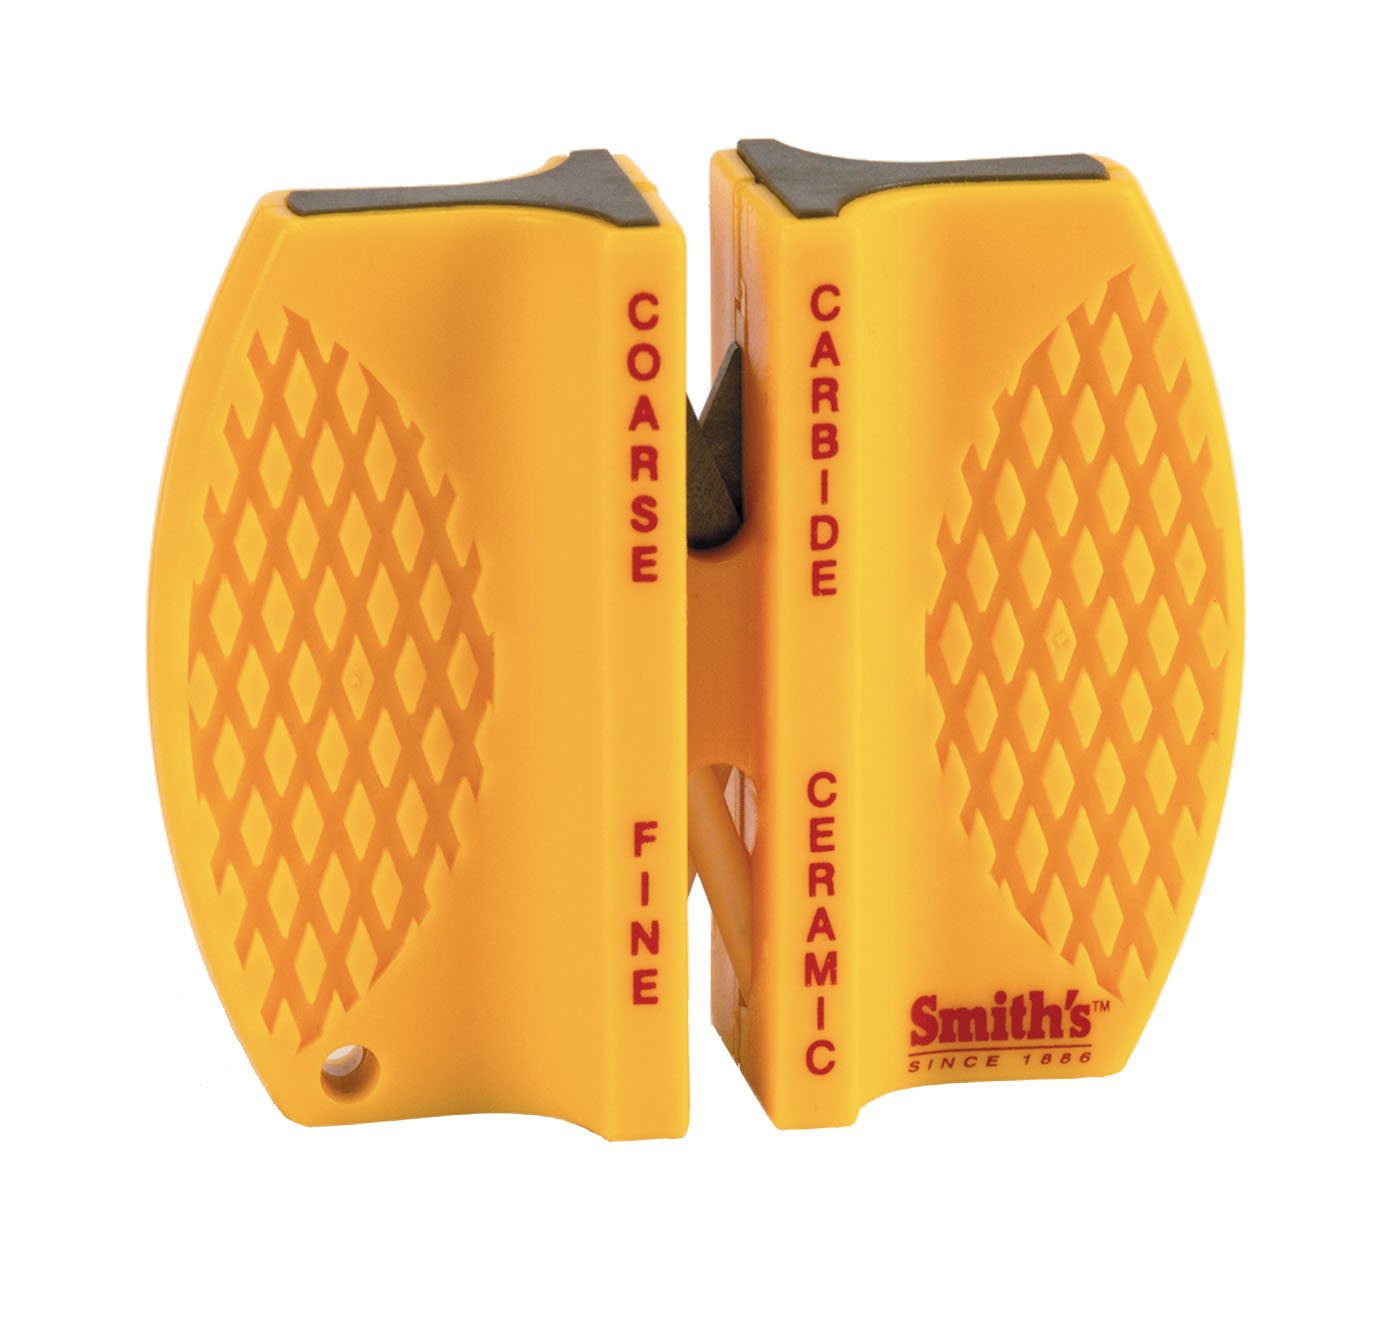
Above, the sharpener I use in my kitchen - The Smith's sharpener. Draw blade from back to front, and make sure to be super careful when inserting the blade, and hold securely. All available in local hardware & sporting goods stores.
Video HERE &
a different version on this sharpener Video here.
The sharpener on the right above is used to draw over a knife, the knife stays still. I simply do not want to bother sharpening my knives 'the long way' after working in the shop all day. This method takes 10 seconds and edge is wicked sharp. it does make the bevel a little steeper than it would be using stones, but it is fast and works for me.
I draw my knife only one way, from back to front, and do not bother with the fine ceramic side, which in my opinion does nothing.

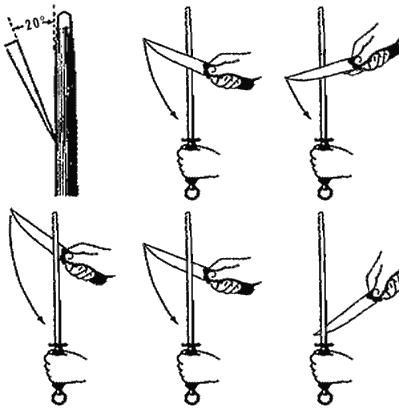
Re: above demo above.
20 degree bevel is to much . Try for 10-15 on my work. Using a steel rod or butcher is a hard method to master. It is easier, I think, to draw the sharpener over the knife, as you will get more control.
This method if done incorrectly (over 20 degrees) will ruin a bevel. One or two strokes at 25-30 degrees will kill an edge. Many many people use this method and have no idea why they are dissatisfied with the edge of their knife. Basically, they are rolling or flattening their edge, instead of refining it.
Your knives will need to have the edge brightened up every 4-6 times they are used, depending on what you do with it. You should notice, after awhile, that the knife will hold a great edge for a long time. It will be noticeable.
If not, let me know. This edge holding ability, equals satisfaction with the product which cannot be shown before hand, only experienced over time. The overwhelming feedback I get is that the edge holds really well.
The wood handle will last forever, if you will keep it from soaking in the sink. Never place any knife in the dishwasher, ever. Your using a fine tool, made by hand.
With the videos mentioned or found on You tube, anyone can learn to use a stone to hone with, with time and patience.
In a sense, a honing is a light sharpening where you only work on the very edge, rather than the bevel and the edge.
Learning to sharpen/hone is a nice skill to have but in my opinion is unnecessary if you do not have the time or inclination. Hence, I encourage you to get the simplest cheapest sharpening tools you prefer and go at it , with NO FEAR.
My knives are made to re-edge and with the smallest effort, you can have sharp ready to go knives with little effort.
My knives can be honed with a 3-part electric sharpener, a Jiff-V-Sharp sharpener, the bottom of a cup or 400 grit sandpaper glued to a paint stick, or any way you choose to rub an abrasive along the edge. These are cruder methods than a regular stone sharpening, but they work fine.
Well heat treated high carbon steel knives should �brighten up' quite easily and noticeably. I suggest that when you get the knife in the mail, to pluck the edge with your thumb. Do not run your finger along the edge, just pluck it at different places on the knife to get a feel for what a sharp knife feels like. This way, when you sharpen, you can pluck the edge your working on, and so know when you�re done.
You can also look at the edge with light from behind your shoulder and the blade edge in front of you. If light reflects off the edge, it is still not sharp, and
needs more work. If you over sharpen and get a wire, it can be easily wiped off with the green part of the Scrubbie sponge. Just very lightly slice at the green part, and it will remove that wire.
If and when the bevel thickens (bevel is the transition between the flat blade and the edge) you will need to flatten the bevel angle back down with a good sharpening. Sharpening removes steel and flattens that bevel. The knife will feel like it is chopping versus cutting when the bevel is thick or the knife is dull.
Sharpening is an easy skill to learn, and once gotten, will save you money and leave you feeling empowered. So do not be afraid - learn to sharpen and hone. Hardware stores sell stones for as little as $5. Ask for the one with course and fine in one stone. Use water only & rinse/dry fully when done. .
Lastly, I should mention that if one looked at a knife edge under a microscope, it would look like the cutting edge of a wood saw. I say this to bring out the point that good knife technique means to saw with the knife, and not just push a knife through something, in only one place along the edge. Many people use the drop/press technique, and wonder why it feels like it is chopping. Back and forth is the right way to use a knife! Use the back edge of the knife blade, like a paper cutter, with the point on the cutting board, to cut carrots, beets, etc.

Copyright held by Michael Moses Lishinsky � 2015�
All rights to all text and images on this web site is
copyright protected via the Digital Millennium
Copyright Act. Click here to download a
pdf copy of full warning. |


