Care of the edge, the surface & wood
handle of my carbon steel kitchen knives
How to re-finish wood and bolsters or brass or copper video. I am using in the video a scouring pad and I also show a sponge also.
Use a cloth towel if you can or paper towel. Rub wood up and down while grabbing knife by the bolster. This will help prevent the abrasion lines from mixing - as the wood goes up and down the handle while the bolsters lines go around. Once done with the wood, do the bolster.
Video - Julia Child talks about carbon steel kitchen knife care
⇒ See 1:20 thru 7 minutes to learn about carbon steel kitchen knives from the original one and only Julia Child ! This is a PBS show first broadcast in early spring of 1963. Julia talks about carbon steel kitchen knives; how to care for them and why to buy carbon steel kitchen knives in the first place. This whole video is wonderful, as the ever charming Ms. Child gives her unique take on French Onion Soup. She even takes the time to clean one of her blades. Although I would suggest avoiding using a scouring cleanser, and simply go right for a scrubbie sponge as shown as you read care instructions below.
Cleansers should be reserved for really rusty funky knives like - click here to see short vid (TOP) here made by a famous local Bon Vivant and raconteur.
The Edge

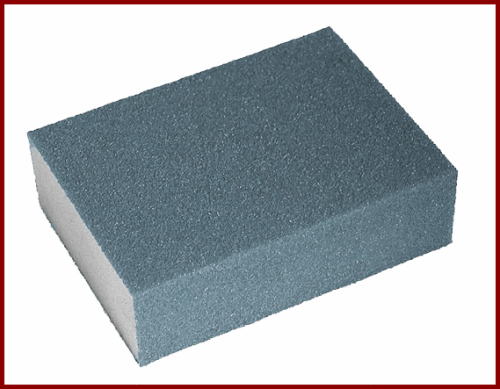
 Left: 120 grit sanding block. Keep in kitchen and use on ovens, pot washing, etc. Very useful tool.
Right: Scrub sponge w/ green scouring pad on one side.
Scotch-brite is twice as durable as all other brands and I highly recommend it.
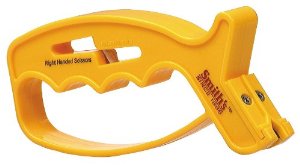
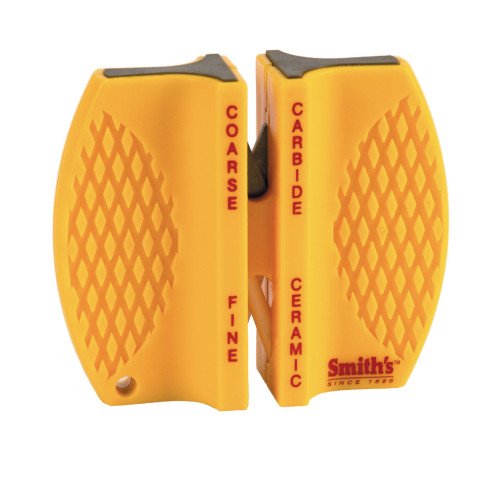
In my kitchen I use Smith’s sharpener (no kidding!). Carbide used in these is very very hard – harder than steel. Smith’s uses opposed carbide, which when drawn over the edge, shaves a tiny bit off the edge on either side. Three swipes and it is ready to go ! Carbide is way harder than steel and very strong. Smith’s dual carbide head is adjustable and replaceable. It is available in local hardware & sporting goods stores. I prefer the yellow unit shown below.. There are cheaper Chinese knock offs around, but these should be avoided, as they use easily ‘crack-able’ ceramic, instead of real carbide.


38 second graphic Video ⇒HERE⇐ shows how to use it.
This method takes 5 seconds and edge is always wicked sharp. It does make the bevel a little steeper than it would be using stones, but it is fast and has worked for me for 25 years perfectly. I always hold the knife with the back against something solid, exposing the edge. Hold and draw the sharpener square to the edge !
I draw it only one way, from back to front, and do not bother with the fine ceramic side, which in my opinion does nothing. I find this method safe and reliable. Attach a float if you take it on a boat.
Your knives will need to have the edge brightened/honed up every 4-6 times they are used, depending on what you do with it. You should notice, after awhile, that the knife will hold a great edge for a long time. It will be noticeable. If not, let me know. This edge holding ability, equals satisfaction with the product which cannot be shown before hand, only experienced over time. The overwhelming feedback I get is that the edge holds
The Surface – the steel part, except the very edge
As far as the blade/surface portion of the knife is concerned, I rinse and wipe it off with a clean dry cotton kitchen towel after I use it. That is all I do, and the blade stays silvery gray. Then I leave it to air dry in the dish drain.
If I want a blade bone dry, I will clean off surface when I finish using the knife, rinse it and then I use a paper towel to dry surface & handle. Paper towels really dry off all the moisture, as opposed to a dish towel which almost always leaves a film of moisture behind.
If I am cooking, I will wipe off pretty consistently between food types throughout the process, and do a double wipe when finished. This includes my wood cutting board. I generally hang a towel over my shoulder when working, but many pull a towel through their belt or apron string, ala “Chef Pepin”
If I cut something that sticks to the surface like cheese, or if I cut raw meat, I use hot water and the green side of a scrub sponge to abrade clean surface off and then “wipe it off”. You can also use salt (Kosher is the best) to clean off the wet surface using a rag or wash cloth. This will allow the built up surface patina to stay put while removing all else. Soap will clean as well, but if you wash with soap, thoroughly dry with cotton or paper towel and let air dry. You can also (optional) warm blade up and oil surface, but I never do this as there is no need. I am not using the surface to cook on and the oil will not stay on over time.
Other ways of cleaning a really abused knife surface is using sand paper grits of 120, 240 and then 320. This is very heavy duty, to be used only for the worst kek and rust on a knife. Rinse when done and as always, dry off surface completely. Any knife you have, no matter how funky and crusty, can be renewed back to the surface with a bit of work. Tip for deep cleaning a wood cutting board. Spray or soak surface with bleach and let soak in. Then use your sharp kitchen knife to scrape off the surface, moving only in one direction. Kitchen knives make excellent scrapers.
The wood handle
Please view this video- Below find a short video demonstrating the use of Howard Feed-n-Wax finish, which I use over two coats of grain filling Bull’s Eye penetrating wax free shellac. The kitchen knife’s finished wood handle’s first coat fills and seals the pores of the wood. The second builds on top of the first coat. Both coats are steel wool rubbed off using three grits of steel wood - 00, 000, & 0000. Then I apply a good coat of Howard’s and allow an hour before hand buffing with a cotton rag. All you need to do to re-finish is to abrade the dry surface to knock off any raised grain, and then apply a coat of Howard. Takes a few minutes only. You can buy a lifetime supply at any hardware store for $10, and it works on any wood furniture.
.
There is no such thing as a hard impenetrable (by water, oils, surfactants, etc.) finish that does not have some toxic repercussions in the home or in the environment. If you want an environmentally clean handle on your fine kitchen tool, it has to have some form of upkeep. Since I and my family consciously try to avoid household chemicals in all forms, then the trick for me was to find a clean finish that needs to be periodically renewed and to keep it easy and simple. The wax finish has Bee’s and Carnuba and Mineral oil.
To refinish at home, simply allow wood handle to dry out (ideally for 1/2 to 1 day), and use 120 grit sand paper to sand down any raised grain on the wood and remove any stains. To remove a layer off the wood handle, any abrasive material will work, even the green side of a new scrubbie sponge. Rub the handle back and forth the long way, until old kek build up is gone.
This is the perfect time to fill in any gaps between wood and steel with wood filler or yellow glue/saw dust. Super glue with baking soda works also. You can use dryer lint instead of saw dust. After filling crack, sand clean. Now the handle is clean and ready for a finish.
Wipe on any convenient oil or wax or wax/oil and allow at least 30 minutes for the wood to soak it up. Then re-coat and allow to sit for 20 minutes. You can also leave off the was and use any kitchen oil pressed from a nut. When the wood does not soak up oil any more, your done. You can then apply a paste wax to the surface if you like, but this is optional. Wood is like any natural material, a little bit of upkeep always goes a long way.
